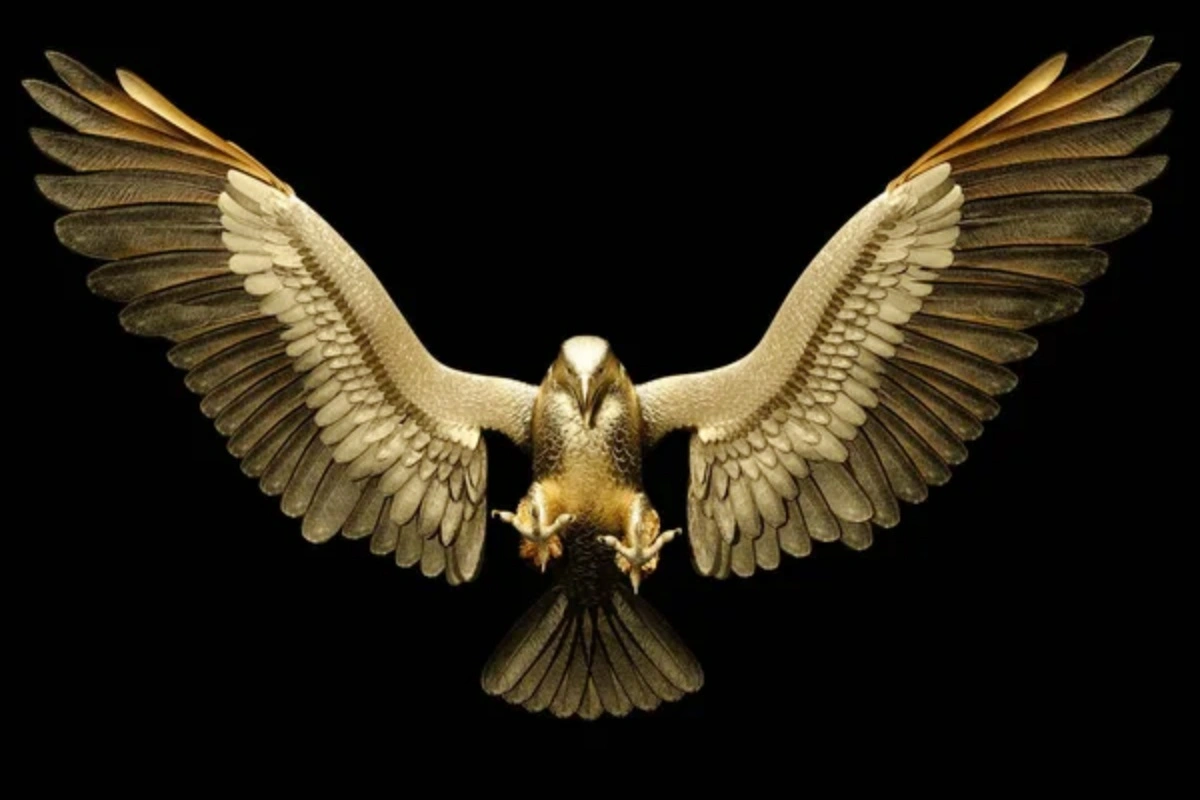
In the early hours of the last day of last month, I finally turned off the pneumatic engraver and rubbed my sore eyes. I’d been carving the eagle’s head under the lamp for almost two weeks, meticulously carving each feather, each one a labor of love.
I was overjoyed, thinking I was close to completing a truly excellent piece.
Then I stepped back and looked—the feathers were arranged so neatly, resembling fish scales. For a moment, I almost wanted to smash the whole thing.
I’d spent so much time on the details, but the overall result looked incredibly fake. Every day on carving forums, people ask the same question: Why do my feathers look so stiff? Why, even though I’ve carved them so carefully, does it still not look real?
Why Feathers Often Look Like Fish Scales
I often see posts on forums complaining about feathers being carved like fish scales.
Most beginners’ work has feathers arranged perfectly, all uniform in size, spacing, and direction, each feather clearly defined and each individual feather perfectly aligned.
I was really fed up with this, so I studied it carefully, comparing it with no fewer than a hundred carvings of varying sizes. Finally, I discovered the flaws.
After comparing my carving with several photos of real eagles, I noticed something strange. The feathers on my sculpture all looked related, almost like brothers and sisters from the same family. Real feathers don’t behave like that. The wing feathers feel sharp and disciplined, while the chest feathers seem almost messy by comparison.
Looking at reference photos, I realized the feathers never line up the way I thought they did. Some overlap heavily, some disappear under others, and some seem to point in slightly different directions.
What bothered me most was the lack of depth. From the front, every feather was visible at once. Nothing seemed hidden underneath, which instantly made the carving look artificial.
Understanding Feather Anatomy
This month, I specifically researched a lot about eagle feathers. I practiced carving each type of feather many times. I believe that only by knowing what feathers a real eagle has, where they are located, and what they look like, can one carve a natural eagle sculpture.
For example, primary flight feathers are the longest, outermost feathers on the wing. They are long and narrow, with a crisp, clean tip, and very strong lines. When carving, you have to capture that stiffness, with clear, sharp edges. You can use a soldering iron to create distinct barb lines; they can’t be soft and limp.
Secondary flight feathers are closer to the body. At first I kept carving them too long, which made the wing look strange. After several attempts, I noticed these feathers were actually much rounder than I expected. When carving, you must follow the curve of the wing, not cut straight ahead.
Covering feathers are small feathers that cover the base of the flight feathers. They have a distinct grouping characteristic, with groups of three to five overlapping each other. When carving, don’t get bogged down in the details of each individual feather; focus on the relationship between the groups, so that the viewer sees a unified area of feathers rather than a bunch of isolated feathers.
Use a heat-pressing tool for stiff feathers and a polishing tool for soft feathers. Use a heat-pressing pen for stiff feathers like flight feathers and tail feathers, and use a whetstone to smooth the texture of soft feathers on the chest and abdomen. I didn’t discover this immediately. After ruining several practice works, I finally understand.
Fine Feather Refinement Techniques
When dealing with delicate details like the edges of feathers, the pneumatic engraver comes in handy. When I first started using it, I was worried it would be too powerful, but actually, the speed can stably output from 400 to 8000 RPM. When dealing with the thinnest feather edges, adjusting it to a low setting is sufficient, preventing the wood from burning.
I usually use a diamond ball tip to first trace the outline, making the top a little deeper and the sides lighter. Then, I use a finer ball tip to smooth the transition areas between the upper and lower layers of feathers, allowing the overlapping edges to blend naturally.
For stiff feathers like flight feathers and tail feathers, I use a stencil to draw the barbs after sculpting. The soft feathers on the chest and abdomen, however, cannot be stenciled. Instead, I gently polish the surface with a fine whetstone or diamond ball tip, blurring the boundaries of individual feathers within the overall composition, resulting in a fluffy and soft appearance. Under the microscope, I suddenly noticed details around the eye that I’d never paid attention to before. Some feathers curved outward, others tucked underneath neighboring feathers, and the pattern was far less orderly than I had imagined.
On my workbench, a pneumatic engraver provides the power, a microscope provides the view, and a soldering iron is responsible for the structure of the bristles. Look at the fine down at the base of those wings; without a microscope, you have no idea what you’re carving. Relying solely on touch, the result is just a mess.