
I have been a woodcarver for many years. I work with my hands every day, shaping wood into small objects that feel warm, natural, and alive. I also run an independent shop where I sell carving tools for beginners and hobby carvers, because I truly believe that the right tools make learning both easier and more enjoyable.
Today, I want to show you how I carve a small wooden bird using only basic carving tools: a carving knife and a pneumatic carving machine. This is not a complicated project. It is slow, calming, and perfect for anyone who wants to learn wood carving step by step.
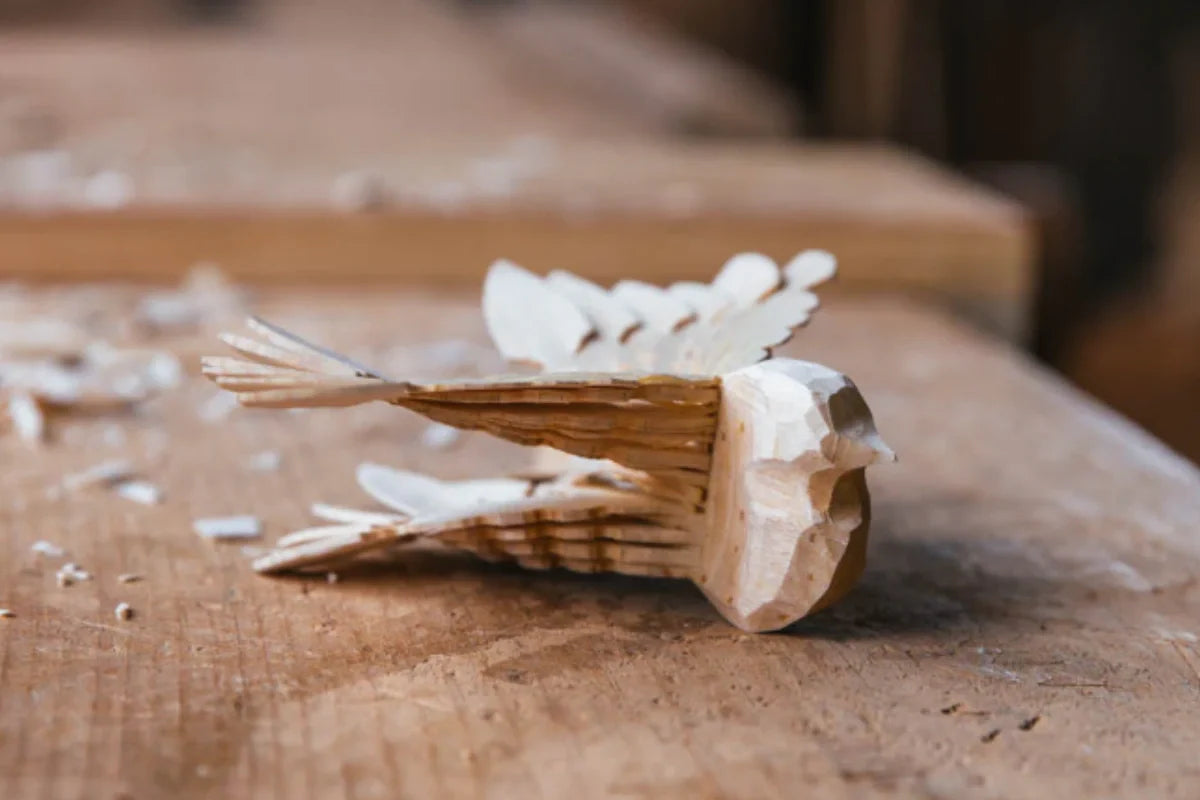
Why a Wooden Bird Is a Great Beginner Project
Many people think carving must start with complicated designs. That is not true.
A wooden bird is ideal because:
Birds are made of soft curves, not sharp angles
The shape is forgiving if your cuts are not perfect
You can finish it in a few hours, not weeks
It teaches you how wood responds to pressure and direction
When I teach beginners, I always start with a bird. It helps build confidence and skill at the same time.
Choosing the Right Wood Matters More Than You Think
Before you touch any carving tools, choose the right wood.
I strongly recommend:
Basswood
Linden
Soft-grain pine
Basswood is my favorite. It is soft, even, and very forgiving. Your knife will glide smoothly, and your pneumatic carving machine will remove material without tearing the grain.
Avoid hardwoods like oak or maple at the beginning. They are beautiful, but they fight back, and that can discourage new carvers.
Cut your wood block to a size that fits comfortably in your palm. A small bird should never feel heavy or awkward to hold.
The Simple Carving Tools I Use
You do not need a full workshop. You only need two main carving tools.
1. A Carving Knife
Your carving knife is your most important tool.
I use it for:
Shaping curves
Defining the head and neck
Refining the bird’s body
A sharp knife is essential. A dull blade forces you to push harder, which leads to mistakes and injuries. Let the knife do the work.
2. A Pneumatic Carving Machine
Many beginners are unsure about using a pneumatic carving machine, but I can say this honestly: it saves time and protects your hands.
I use my pneumatic carving machine for:
Removing excess wood quickly
Rough shaping the bird’s form
Creating smooth transitions
A small, home-use pneumatic carving machine is more than enough. You do not need an industrial setup. Used gently, it gives you control without stress.
Step 1: Rough Shaping With a Pneumatic Carving Machine
I always start with rough shaping.
Hold the wood securely and begin removing the sharp corners. Do not think about details yet. Your goal is to turn a block into a simple oval shape.
Focus on:
A rounded body
A slight rise where the head will be
A tapered back for the tail
Work slowly. Light pressure is better than force. The pneumatic carving machine should feel like an extension of your hand, not something you are fighting.
Stop often and look at the shape from all angles. This habit will improve your carving faster than anything else.
Step 2: Refining the Shape With a Carving Knife
Now put the machine aside and take your carving knife.
This is my favorite part. It is quiet, focused, and personal.
Use shallow cuts to:
Smooth the body
Shape the neck
Round the head
Always carve with the grain when possible. If the wood starts tearing, change direction. Wood will tell you what it wants if you pay attention.
Do not rush. A good bird shape comes from patience, not speed.
Step 3: Shaping the Head and Beak
The head gives the bird its character.
To carve the beak:
Lightly mark a small triangle
Cut gently from both sides
Keep the beak subtle and simple
A common beginner mistake is making the beak too large. Small birds look more natural and elegant.
For the eyes, you can:
Leave them implied
Or add tiny indentations with your knife tip
Both approaches work beautifully.
Step 4: Tail and Balance
The tail helps balance the whole form.
Use your knife to taper the back gently. Avoid sharp edges. Birds are soft creatures, and your carving should reflect that softness.
Check the balance by placing the bird on a flat surface. If it tips forward or backward, adjust slightly. This small step makes a big difference in how finished the piece feels.
Step 5: Adding Light Texture (Optional)
This step is optional but rewarding.
I sometimes add light texture using:
The tip of my carving knife
Or a fine bit on the pneumatic carving machine
Do not carve every feather. Suggest texture instead. Light marks catch the light beautifully after finishing and make the bird feel handmade, not mechanical.
Step 6: Sanding and Finishing
Use fine sandpaper, starting around 220 grit and moving up to 400.
Sand gently and evenly. Do not erase all tool marks. Some marks give character and show the carving process.
For finishing, I recommend:
Natural oil
Beeswax
Or a light stain
These finishes protect the wood while keeping its natural feel.
Why Good Carving Tools Make Learning Easier
I have seen many beginners struggle, not because they lack talent, but because they lack proper carving tools.
When you use:
A sharp carving knife
A reliable pneumatic carving machine
You spend less time fighting the wood and more time learning from it.
That is why I started my shop—to help people enjoy carving instead of giving up too soon.
Final Thoughts From an Old Workbench
Wood carving is not about perfection. It is about patience, focus, and creating something real with your hands.
Your first wooden bird will not be perfect—and it should not be. It will be honest. It will teach you. And it will make you want to carve the next one.
Start simple. Use the right tools. Let the wood guide you.
That is how every woodcarver begins.
Everything is very open and very clear explanation of issues. was truly information. Your website is very useful. Thanks for sharing.
Recently I became interested in numismatics. I eventually discovered https://groshi.xyz online.
I was looking for details about rare and collectible coins, and most sources were too general.
On this website I found useful guides about coins, their history, and their value. It helped me better understand current market tendencies.
I can confidently recommend this resource if you’re interested in coin collecting or want reliable information about numismatics.
I was trying to find out if I could increase the RAM on my laptop. My
research eventually led me to https://znayka.com.ua.
I couldn’t find detailed specifications on most websites. Many sources were missing key details.
On this site I found useful technical guidance, along with images that made everything much easier to understand.
I suggest checking this site if you want reliable information about laptops and hardware upgrades.