
When performing intricate engraving work—such as fine craft carving, jewelry engraving, precision metal lettering, or micro-detail sculpture—a Stereo Microscope is an indispensable tool. A high-quality stereo microscope for engraving allows artists and technicians to magnify tiny details that are invisible to the naked eye. With enhanced depth perception and three-dimensional viewing, it ensures better control, improved accuracy, and a higher level of craftsmanship.
However, even the most advanced stereo microscope can negatively impact engraving results if its lenses are not properly maintained. Dust particles, oil residue, or fine polishing debris can accumulate on the optical surface. These contaminants may create visual distortion, false shadows, or blurred edges—leading to engraving defects or uneven cuts.
For engraving professionals and hobbyists alike, learning the correct method for cleaning a stereo microscope lens is essential. Proper maintenance not only improves optical clarity but also extends the lifespan of your equipment.
Before starting any cleaning procedure, always make sure the microscope and engraving system are powered off and fully cooled down.
Why Cleaning a Stereo Microscope Is Critical for Precision Engraving
In precision engraving applications, clarity equals accuracy. A clean stereo microscope lens ensures:
-
Sharp, distortion-free magnification
-
Accurate depth perception
-
Clear observation of engraving lines
-
Better control during micro engraving
-
Reduced risk of surface mistakes
If you notice blurred imaging, inconsistent lighting, or unexpected marks during engraving, your stereo microscope optics may need cleaning.
Regular cleaning of a stereo microscope for jewelry engraving or laser engraving inspection helps maintain professional-level results.
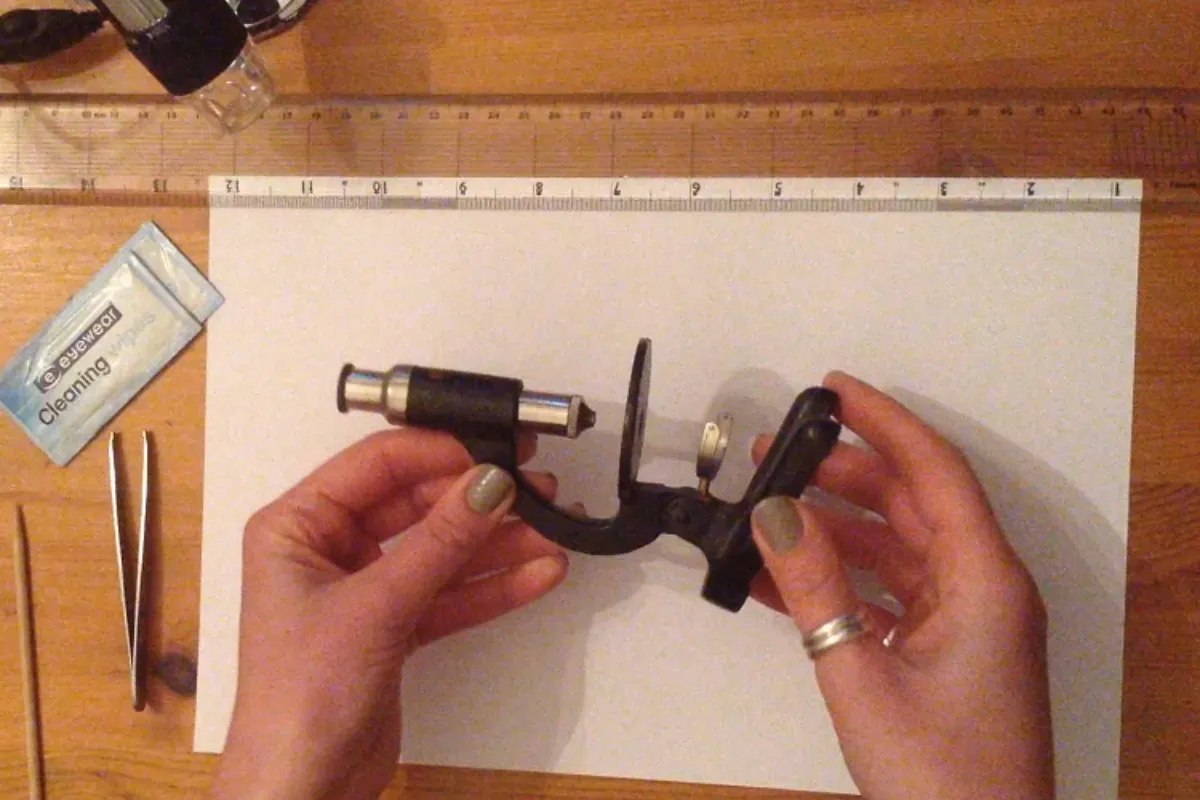
Step 1: Prepare the Proper Cleaning Tools
Before disassembling or touching any optical component, prepare a clean and dust-free workspace.
You will need:
-
Medical-grade alcohol (75% or 95% is recommended)
-
A lint-free cloth or professional lens cleaning cloth
-
A clean, stable work surface
Important Warning
Do NOT use:
-
Paper towels
-
Regular fabric cloth
-
Rough wipes
-
Cotton tissues
These materials may scratch the optical coating or leave fibers behind. Optical lenses in a stereo microscope are precision-coated surfaces. Even microscopic scratches can affect light transmission and image quality.
Using proper lens cleaning tools for a stereo microscope is one of the most important steps in maintaining optical clarity.
Step 2: Remove the Laser Window Lens Carefully
In many engraving systems that integrate laser components and inspection optics, the laser window lens and galvo mirror are located near the core optical pathway.
To remove the laser window lens:
-
Locate the lens position within the optical system.
-
Gently rotate it counterclockwise.
-
Carefully lift it out without tilting or shaking.
Avoid dropping or bumping the lens. These components are delicate and may crack or misalign if mishandled.
The galvo mirror and laser window lens are typically positioned in the central optical path. When cleaning stereo microscope components used for laser engraving, always handle them with steady hands and minimal movement.
Step 3: Clean the Galvo Mirror and Lens Surfaces Properly
This step requires patience and precision.
Cleaning Procedure:
-
Lightly dampen the lint-free cloth with alcohol.
-
Do NOT oversaturate the cloth. Alcohol should not drip.
-
Gently wipe the front and back surfaces of the lens.
-
Use slow, single-direction strokes.
-
Avoid circular or back-and-forth scrubbing.
When cleaning a stereo microscope lens, remember:
-
Never use fingernails or sharp objects.
-
Do not apply pressure.
-
Do not allow alcohol to air dry naturally.
Alcohol must be gently wiped until completely dry. Allowing it to evaporate on its own may leave water marks or residue spots, especially if the alcohol contains moisture impurities.
Proper lens cleaning technique for a stereo microscope ensures no streaks, no scratches, and no residue.
Step 4: Reinstall the Laser Window Lens
After confirming the lens is fully dry:
-
Align the lens carefully with its original position.
-
Rotate clockwise to reinstall.
-
Tighten gently—do not over-tighten.
Excessive force may damage the threads or cause misalignment in the optical path.
Once reinstalled, power on the system and check image clarity through the stereo microscope. The magnification should appear sharp, bright, and free of distortion.
Common Mistakes When Cleaning a Stereo Microscope
To extend the service life of your stereo microscope for precision engraving, avoid the following errors:
❌ Using overly wet cloths
❌ Touching the optical surface with bare fingers
❌ Using low-quality or impure alcohol
❌ Frequent unnecessary disassembly
❌ Blowing compressed air at close range
Strong air pressure can push more dust particles into internal components. Instead, use controlled and indirect air flow if necessary.
Understanding how not to clean a stereo microscope is just as important as learning the correct method.
Stereo Microscope Lens Maintenance Tips
Cleaning is only part of proper stereo microscope care. Daily maintenance habits significantly affect performance and durability.
Recommended Maintenance Practices:
✔ Cover the microscope with a dust cover after engraving work
✔ Store in a low-humidity environment
✔ Avoid polishing or grinding near the microscope
✔ Inspect the galvo protective lens regularly
✔ Keep the workspace clean to reduce airborne debris
For engraving workshops that involve metal polishing or stone grinding, dust control is especially critical. Fine particles can easily settle on optical lenses and reduce viewing clarity.
Routine stereo microscope maintenance for engraving workshops ensures consistent performance over time.
How Often Should You Clean a Stereo Microscope?
Cleaning frequency depends on usage intensity.
Suggested Inspection Schedule:
-
High-frequency use (daily engraving) → Inspect weekly
-
Moderate use → Inspect every two weeks
-
Occasional use → Inspect monthly
If you notice:
-
Blurred magnification
-
Light scattering
-
Dark spots in the viewing field
-
Inconsistent brightness
Inspect and clean the stereo microscope lens immediately.
Preventive maintenance is far more effective than corrective repair.
Why Proper Lens Care Protects Your Engraving Precision
In fine engraving, even minor visual distortion can translate into permanent surface errors. A properly maintained stereo microscope provides:
-
Accurate micro-line tracking
-
Cleaner engraving curves
-
Better symmetry
-
Improved finishing quality
-
Reduced material waste
For jewelry engraving, metal nameplate marking, glass etching, or artistic micro carving, optical clarity directly influences craftsmanship.
Maintaining a stereo microscope for engraving work is not just equipment care—it is precision protection.
Final Thoughts
In the world of detailed engraving, clarity means control. And control means precision.
Although the lenses in a stereo microscope are finely engineered and sensitive, they can maintain long-term stability and sharpness if cleaned correctly and handled with care.
Follow standardized cleaning procedures. Use proper materials. Avoid common mistakes. Develop consistent maintenance habits.
Remember this simple principle:
Taking care of your stereo microscope lenses means taking care of your engraving accuracy.
With proper stereo microscope cleaning and maintenance, your optical system will continue delivering sharp, distortion-free magnification—supporting your craftsmanship for years to come.
I am no longer sure where you are getting your info, but good topic. I must spend a while learning much more or figuring out more. Thank you for fantastic information I used to be on the lookout for this information for my mission.
I always was concerned in this topic and still am, thankyou for putting up.