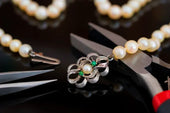
Ever wondered how beautiful silver jewelry pieces are seamlessly joined together? The answer lies in silver soldering, a fundamental skill in jewelry making that allows you to connect silver components using heat and precision. Whether you’re looking to create your own rings, pendants, or bracelets, learning how to solder silver opens up a whole new world of creative possibilities.
What Is Silver Soldering Used For?
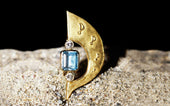
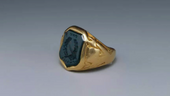
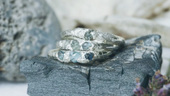
Silver soldering is one of the most essential techniques in jewelry making. It allows you to join two or more pieces of silver by melting a filler metal—called solder—into the joint. The result is a strong, seamless bond that’s both durable and visually clean. Unlike glue or mechanical fasteners, soldering creates a permanent and professional connection, which is especially important for fine jewelry.
You can use soldering when making rings and bracelets to close the loop, ensuring it retains its shape and strength.
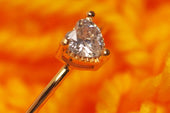
When you’re mounting a gemstone, soldering connects the bezel or prong setting to the base or band.
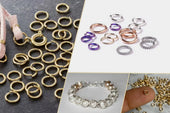
Silver jump rings and chains often require soldering to ensure security and prevent accidental opening.
Types of Silver Solder
Not all silver solder is the same—there are several types, and each has a different melting temperature. Knowing the differences is key to working efficiently and avoiding accidents during multi-step soldering projects. Silver solder typically comes in three main grades:
1. Hard Solder
Melting Point: Highest (around 750–780°C / 1380–1436°F)
Best For: First joins in multi-step projects
Why Use It: Strongest bond and least noticeable seams
Tip: Use hard solder first so it won’t re-melt during later stages
2. Medium Solder
Melting Point: Medium (around 700–730°C / 1292–1346°F)
Best For: Second joins after using hard solder
Why Use It: Balances strength and ease of flow
2. Easy Solder
Melting Point: Lowest (around 670–700°C / 1238–1292°F)
Best For: Final joins or repairs
Why Use It: Flows quickly and reduces risk of re-melting previous joins
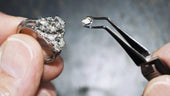
All three solders come in wire, sheet, or chip form. Beginners often prefer easy solder to start with because it’s more forgiving and melts faster.
Do You Need Flux for Silver Soldering?
Absolutely, flux is a must when soldering silver. Without it, your solder won’t flow where you want it to go, and the silver surface will oxidize quickly under heat. This oxidation, known as fire scale, creates a dull layer that blocks proper bonding and makes your jewelry harder to clean and polish. In short, flux is like a protective shield, it keeps your silver clean and “solder-ready” while you work.
There are a few types of flux commonly used in silver soldering:
l Paste Flux
l Liquid Flux
l Spray Flux
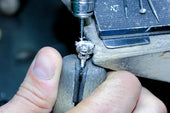
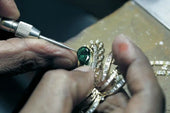
How to Solder Silver Jewelry
Now that you know the basics—what silver soldering is, the types of solder, and the role of flux—let’s put it all together. Here’s a beginner-friendly, step-by-step guide to soldering silver jewelry.
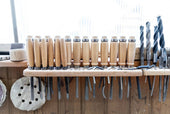
Gather Your Tools and Materials
Before you begin, make sure you have everything you need:
l Silver pieces to be joined
l Silver solder (easy, medium, or hard)
l Flux
l A soldering block or fire brick
l Tweezers and soldering pick
l Torch (butane or propane, depending on your setup)
l Pickle solution and a pickle pot
l Water dish and soft brush
Clean Your Silver
Clean metal solders better. Use fine sandpaper, a file, or rubbing alcohol to remove any grease, tarnish, or debris from the silver surfaces. Make sure the pieces fit tightly together, gaps make soldering harder and messier.
Apply Flux
Use a small brush or pick to apply a thin layer of flux to the joint area. This helps prevent oxidation and allows solder to flow smoothly. Don’t forget to apply flux to both pieces, especially where they touch.
Place the Solder
Cut a small chip or snip of silver solder and place it near or on the joint. Use tweezers or a soldering pick for accuracy. The chip should touch both surfaces to ensure a strong bond. You can use a tiny dab of flux to hold the chip in place.
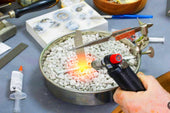
Heat the Piece
Light your torch and begin heating the area slowly and evenly. Don’t aim the flame directly at the solder right away. Instead, heat the surrounding metal to bring the whole area up to temperature. As you heat, the flux will bubble, turn white, and eventually become clear and glassy, this means it’s ready.
Watch the Solder Flow
Once the metal is hot enough (but not melted!), the solder will suddenly flow and fill the joint. You’ll see it flash like quicksilver. As soon as that happens, remove the heat. Don’t overheat! Continued torching after solder flows can cause nearby joins to melt or the metal to overheat.
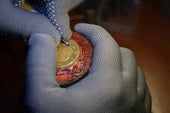
Quench and Pickle
After the piece cools for a few seconds, drop it into water using tweezers. Once fully cooled, place it into a pickle solution (a mild acid) to remove oxidation and flux residue. Let it soak until the surface is clean—usually just a few minutes—then remove and rinse with water.
Inspect and Polish
Examine the joint. It should be smooth, shiny, and seamless. If needed, sand off excess solder or fire scale using fine-grit paper or polishing tools. Then finish the piece with a polishing cloth, tumbler, or buffing wheel to give it that final shine.