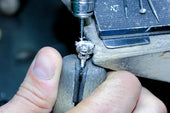
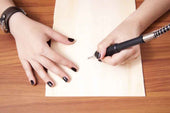
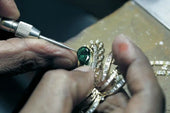
As beginners learn to carve, the level of carving tools they use will gradually increase. Finally will come into contact with and pneumatic engraving machine as some professional engraving tools. For beginners, the first time to use the pneumatic engraving machine may feel a little complicated and strange. However, as long as you master the correct operating steps and precautions, you will be able to successfully complete the engraving task. This blog will give you a detailed introduction to the complete process of using a pneumatic engraver for the first time for beginners to help you get started quickly.
Before using
1. Read the operation manual
Pneumatic engraving machine is a professional tool, and its operation manual will explain in detail the machine's structure, functions, safety precautions and maintenance methods. Beginners must read the operation manual carefully to avoid unnecessary mistakes.
2. Check the status of the equipment
Before starting the pneumatic engraving machine, you need to check whether the following equipment can work normally:
Air connection: Make sure the pneumatic engraving machine is firmly connected to the air compressor and the air pressure index is normal.
Air hose and joints: check whether the air hose is broken or leaking, and whether the joints are tightened.
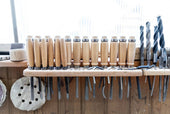
Drill installation: choose the appropriate engraving drill and use a wrench to tighten the chuck to ensure that it is firmly installed in order to avoid loosening or falling off the drill during the engraving process.
3. Wear protective equipment
Pneumatic engraving machine in operation will produce flying debris, may lead to beginners in the operation of the injury. Therefore, the following protective equipment must be worn: goggles, dust mask, protective gloves and earplugs.
4. Fixed engraving materials
Beginners according to the need, ready to carve the material (such as wood, metal, etc.), using clamps or suction cups to fix it on the worktable, so that the material will not move easily.
Operation steps in use
1. Start the pneumatic engraver
Press the start button of the pneumatic engraver and check if the machine is running normally. Listen carefully to the sound of the machine running, if there is any abnormal noise or vibration, turn off the machine immediately and check the problem.
2. Adjust pressure and speed
Pneumatic engraving machines are usually equipped with pressure and speed adjustments, which beginners need to adjust according to the hardness of the engraving material and the engraving needs:
Wood engraving: choose a lower pressure and rotational speed to avoid the material being over-cut.
Metal engraving: select a higher pressure and speed to ensure a clear engraving result.
Fine engraving: Reduce the RPM for better control of engraving accuracy.
3. Start engraving
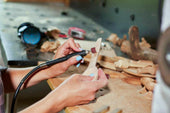
Holding position: Hold the engraving pen of the pneumatic engraving machine tightly with one hand to maintain a stable position. The other hand assists in moving the engraving material and controlling the direction. According to their own design ideas, the process of constantly adjusting the angle between the engraving drill and the material.
Control the strength: Beginners tend to use too much force, resulting in too deep engraving or material damage. It is recommended to try with a lighter force first, and gradually familiarize yourself with the operating feel of the machine. A common technique is to slowly push the tip of the engraving machine forward.
4. Pay attention to safety
Concentration: When engraving, you need to pay full attention to avoid operating errors due to distraction.
Prevent overheating: prolonged use of the pneumatic engraving machine will lead to overheating of the drill bit, it is recommended to pause the operation of the machine at regular intervals to allow the machine to cool down.
After use
1. Turn off the equipment
After engraving, turn off the air switch and disconnect the air hose. Ensure that the machine is completely stopped before proceeding with subsequent operations.
2. Clean the machine
First wipe the surface of the pneumatic engraving machine with a clean cloth to remove dust and debris. Next check the drill bits for wear or damage and replace them with new ones if necessary. Finally, clean the air hose and joints to make sure there is no air leakage or blockage.
3. Regular Maintenance
Lubrication: add lubricant to the moving parts of the pneumatic engraving machine on a regular basis to ensure smooth operation.
Check air pressure: check whether the air pressure meets the requirements of the equipment before each use, insufficient air pressure will affect the engraving effect.
Replacement of wearing parts: drill, chuck and other wearing parts need to be regularly checked and replaced to ensure the quality of engraving.
Common problems and solutions
The first use of pneumatic engraving machine some small problems is normal, the following are some relevant content.
The machine can not start: check whether the gas source connection is normal, whether the air pressure is up to the requirements, whether there is air leakage or blockage of the air pipe.
Carving effect is not ideal: adjust the pressure and speed to ensure that it is suitable for the current carving material. Or check whether there is wear and tear on the drill bit to affect the engraving effect.
Machine noise is too loud: drop lubricating oil to reduce the friction of equipment operation.
Summarize
For beginners, the first time to use the pneumatic engraving machine may feel a little complicated, but as long as you follow the correct steps and pay attention to safety matters, you will be able to successfully complete the engraving task.


