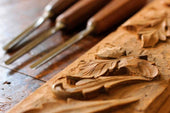
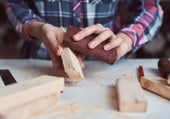
Exploring the art of sculpting in a fun way is preferable to the stereotypical process of preparing metal materials and creating a piece of artwork using various specialized sculpting tools. If you like to sculpt in a fun way, then sculpting metal clay is a perfect choice. The following guide to sculpting metal clay will take you through the various stages of shaping and sculpting metal clay using a variety of sculpting tools and techniques, giving you the freedom to unleash your creative juices.
What is metal clay made of?
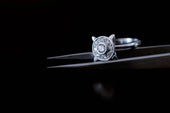
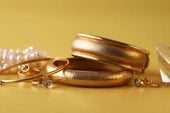
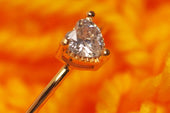
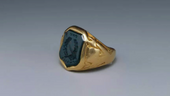
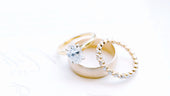
As the name suggests, metal clay is a material that is easier to use for shaping and sculpting by mixing various metal materials and clay together. For example, a silver ring with a unique shape is made by using silver clay to create a basic ring outline, then using a sculpting tool to carve some patterns, and then firing it to finish.
Understanding the Drying Time of Metal Clay
Before sculpting metal clay, it is important to understand the different stages of the drying process. Each stage of the drying process is characterized by different properties of the clay and requires different treatments.
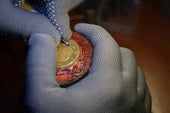
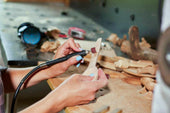
Stage 1: Fresh and Soft
This is the softest and most malleable stage after the clay is taken out of the package, and it is the best time to build the overall shape and carve patterns and textures, which can be shaped and cut at will. It can be shaped and cut at will, for example, to add a fixed texture to a pattern stamp, or to set a gemstone that is resistant to high temperature firing.
Stage 2: Dry on the outside, wet on the inside
At this stage, the water on the surface of the metal clay begins to evaporate, while the interior remains moist. At this point it is necessary to continue adjusting the shape without damaging the surface structure of the metal clay. Be careful not to apply too much force, as cracks are likely to occur when the surface hardens.
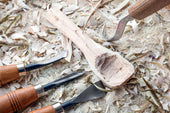
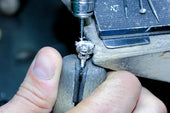
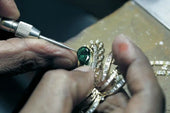
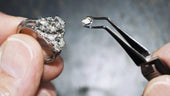
Stage 3: Completely dry state
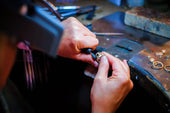
Completely dry metal clay is no longer malleable, but can be detailed and finished with sculpting tools (files, needlepoint pens, pneumatic sculptors, etc.). Fine carving and sanding are done to prepare the clay for firing.
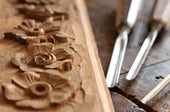
Use of carving tools in different stages
Stage 1
Cutting and molding with engraving tools is best done when the clay is still soft.
Using a metal clay knife or mold, press the desired shape precisely into the clay, keeping the details crisp and deep.
Once the pattern has been imprinted, use a metal clay knife to clean up the edges.
To keep the thickness of the metal clay even, it is necessary to place guides of the same height on both sides of it.
The first stage is primarily intended to complete the basic shape of the metal jewelry. For example, the base shape of a ring band or a necklace pendant.
Second stage
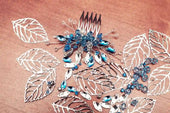
This stage mainly uses rubber or brass texture plates to deepen the texture marks. Because the clay shrinks during the process of firing the metal clay, the imprint applied needs to be clear and deep enough so that the fired pattern is not blurred.
Stage Three
Once the metal clay is completely dry, it needs to be fine-tuned with a sculpting tool. A file is used to trim the dimensions and edges, followed by a circular cutter to create more delicate curves and details. Where deeper carving is required, use a pin-prick tool (pneumatic carver equipped with a spiked tip) to gradually deepen the carving using gentle advancement.
Tips for the different stages of carving
Stage 1
Roll an appropriate amount of metal clay into a small ball and place it in the center of the mold, then push it into each corner of the mold with your fingertips, removing any excess clay with a flat-tipped carving knife to avoid seams around the edges of the fired piece.
Second stage
When using the brass texture plate to deepen a fixed pattern, the plate should be placed on top and bottom of the clay and rolled with a roller from the bottom to the top in one go, avoiding repeated rolling which may result in overlapping textures.
Stage Three
Completely dry metal clay is prone to cracking and excessive force should be avoided. It is recommended to use a pneumatic engraving machine to deepen the details, which saves time and effort, is easy to operate and allows you to adjust the direction of the engraving according to your ideas at any time. If you want to add some complex and delicate textures, you can also use a stereoscopic microscope to enlarge the carving surface.
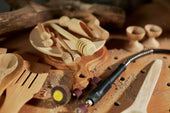
Sculpting for beginners
Metal clay sculpture is not only a simple technique, but also has a lot of creative possibilities.
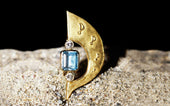
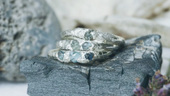
In basic metal clay sculpting, beginners can not only sculpt rings, but also other unique shapes.
When first trying, beginners can start with simple textures and basic molds. After becoming proficient, they can combine a variety of tools and experiment with layered or more three-dimensional carving patterns. As long as you arrange the sculpting steps according to the characteristics of different stages of metal clay, your work will be more complete and beautiful.
Conclusion
Sculpting metal clay is a process that combines technology and art, and with the knowledge gained from this article, you will find that trying to sculpt precious metal clay is a very interesting process. For beginners, learning to sculpt precious metal clay first can help you create better jewelry pieces.